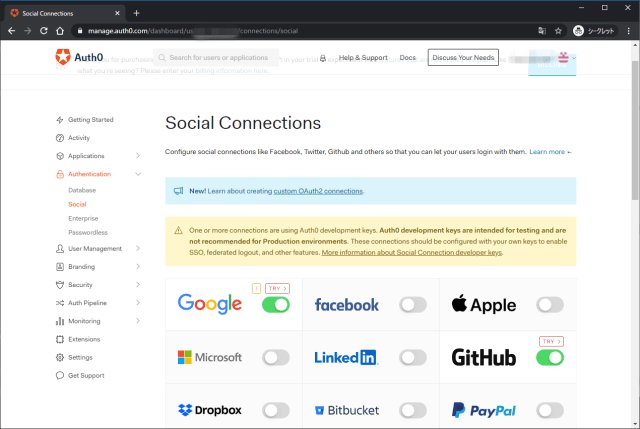
動かない

コード0x8004de40
インターネットにはつながっていますか?のようなものを除き主要な対策は3つ。

Onedrive Error width=480

対策1: TLSが有効であることを確認する

  1. inetcpl.cplを実行
  2. 詳細設定でTLS1.0、TLS1.1、TLS1.2にチェックが入っていることを確認

対策2: Windows Socket (Winsock)カタログをリセットする

  1. cmdを管理者で実行
  2. 起動したコマンドプロンプトでnetsh winsock reset catalogを実行

Onedrive Error width=480

対策3: OneDriveをリセットする

大量にファイルがあると、時間がかかるので注意。

  1. %localappdata%\\Microsoft\\OneDrive\\onedrive.exe /resetを実行
  2. %localappdata%\\Microsoft\\OneDrive\\onedrive.exeで再起動

それでも動かない

これら主要なワークアラウンドでこの時は結局解決しなかった。
しかし、溜まっていたWindowsUpdateを適用したらなぜか解消……。なにそれ。

コメント・シェア

OneDriveの個人用Vaultとは

Office365を利用していると1TBのストレージと制限なしの個人用Vaultが使える。

個人用Vault、表記によってはPersonal Vaultになっている。使用しているプランによって使えるファイル数制限がある。
個人用Vaultは普段ロックされ、多要素認証を行うことで保護したフォルダーにアクセスすることができる。利用しない場合は20分(モバイルアプリでは3分)で自動ロックされる。

項目 Microsoft 365 Personal OneDrive Standalone 100GB OneDrive Basic 5 GB
合計ストレージ 1 TB 100 GB 5 GB
個人用Vault 制限なし 3ファイル 3ファイル

個人用Vaultを使う

OneDriveのフォルダー内にある個人用Vaultのアイコンからセットアップ開始

OneDriveVaultwidth=320

OneDriveVaultwidth=320

OneDriveVaultwidth=320

個人用Vaultアイコンから再度実行すると、本人確認を促される。

OneDriveVaultwidth=320

OneDriveVaultwidth=320

OneDriveVaultwidth=320

本人確認後、フォルダーを読み書きできるようになる。

OneDriveVaultwidth=320

個人用Vaultフォルダーのロック

手動でロックすることもできる。

OneDriveVaultwidth=480

ロックするとフォルダーへのアクセスはエラーに。

OneDriveVaultwidth=480

同期もできなくなっている。

OneDriveVaultwidth=320

ロックを解除するとOneDriveの設定画面でも確認できる。ここからロックすることもできる。

OneDriveVaultwidth=320

多要素認証を変更する

メールではなくGoogleAuthenticatorのようなアプリを利用するように変更することができる。

  1. Microsoft アカウントにアクセス

OneDriveのアカウントでサインイン

OneDriveVaultwidth=640

OneDriveVaultwidth=640

OneDriveVaultwidth=640

セキュリティ情報を更新する。

OneDriveVaultwidth=640

OneDriveVaultwidth=640

OneDriveVaultwidth=640

OneDriveVaultwidth=640

OneDriveVaultwidth=640

認証アプリでのコード入力を追加する。身元を証明する方法のサインインまたは確認の新しい方法を追加から追加する。

OneDriveVaultwidth=640

アプリを使う。

OneDriveVaultwidth=640

Microsoft Authenticatorは使わないのでスキップ。

OneDriveVaultwidth=640

自分のAuthenticatorアプリでQRコードを読み込み設定。

OneDriveVaultwidth=640

認証アプリからコードを入力するが追加されている。

OneDriveVaultwidth=640

個人用Vaultにアクセスしようとすると、今度は認証アプリでコード入力が求められる。

OneDriveVaultwidth=320

自動ロックの時間を設定する

OneDriveのアカウント設定で設定できる。標準は20分。

OneDriveVaultwidth=480

コメント・シェア

ExpoのWebIDE環境Snack

 
カテゴリー JavaScript Mobile SaaS   タグ

Expo Snack

Expoに登録するとSnackというWeb IDE環境を利用できる。ローカルにExpoの環境を準備しなくても開発を行うことができる。iOSやAndroidのエミュレーション環境を含めひととおりの環境がある。

Snackをつかう

Snacksから一覧を確認できる。New Snackから新しいSnackを作成。

Expo Snacks width=640

適当に付与されたSnack名(ここではthrilled pizzaになった・・・ワクワクピザ?)でプロジェクトが生成される。

Expo Snacks width=640

右側のMy DeviceiOSAndroidWebから選択して各画面のテストを行うことができる。変更はリアルタイムで反映。

Expo Snacks width=640

iOSTap to playを実行すると、エミュレーターと思われる環境が起動する。

Expo Snacks width=640

コードを変更すると画面も表示が変更される。

Expo Snacks width=640

自分のデバイスで動作させる

Expo Clientアプリをデバイスにインストールする。

カメラでQRコードを撮影すると、Expo Clientアプリから起動を促される。

コメント・シェア

GitHub Actions Result width=640

Expoでできること

The fastest way to build an app

With Expo tools, services, and React, you can build, deploy, and quickly iterate on native Android, iOS, and web apps from the same JavaScript codebase.

Access to device capabilities like camera, location, notifications, sensors, haptics, and much more, all with universal APIs.

Build service gives you app-store ready binaries and handles certificates, no need for you to touch Xcode or Android Studio.

Over-the-air updates let you update your app at any time without the hassle and delays of submitting to the store.

  • Android、iOS、Webアプリの構築からデプロイを迅速に行うことができる
  • カメラ、位置情報、通知、センサー、触覚などにユニバーサルAPIでアクセス
  • ネイティブ開発環境(Xcode、Android Studio)など必要なし
  • Over-the-airアップデートにより、いつでもアプリをアップデートできる

Over-the-airアップデート

ストアでの審査をとおさず、かんたんにアプリを端末配布することができる。
配布はクライアント・サーバ型で行い、端末にはこのためのクライアントアプリをインストールする必要がある。

環境さえととのえてしまえば、これだけでアップデートできる。

1
expo publish

GitHub Actions Result width=640

AppStoreやGooglePlayでの配布

開発したアプリはクライアントアプリなしで、通常のプロセスで配布することができる。
この公開用アプリのビルドは以下を実行するだけである。

1
2
exp build:ios
exp build:android

Expoでできないこと

Expo SDKがReact Native、iOS SDK、Android SDKをラップして抽象化しているため、ネイティブレイヤーには直接アクセスできない。

何が利用できるかはSDKのドキュメントから確認できる。

上の方からいくつか見てみても、

マネタイズのための広告Google Admob

Webビュー経由での認証ならAuthSession

ライトモード・ダークモードのAppearance

など、最新の機能でなければ多くの機能が提供されている。

Expoに登録する

右上のアイコンからサインアップすることができる。

ReactNative Expo width=640

ログイン。シンプルなメニュー構成。

ReactNative Expo width=640

ビルド状況などを確認することができる。

ReactNative Expo width=640

コメント・シェア

Django REST frameworkチュートリアル

公式のQuick Startからチュートリアルへ。

1
2
3
4
5
6
7
8
9
10
11
12
13
14
15
16
17
18
19
20
21
22
23
24
25
26
27
28
29
30
31
32
33
34
35
36
37
38
39
40
41
42
43
44
45
46
47
48
49
50
51
$ mkdir tutorial
$ cd tutorial
$ django-admin startproject tutorial .
$ cd tutorial
$ django-admin startapp quickstart
$ pwd
/work/tutorial/tutorial
$ cd ..
$ find .
.
./manage.py
./tutorial
./tutorial/__init__.py
./tutorial/asgi.py
./tutorial/quickstart
./tutorial/quickstart/__init__.py
./tutorial/quickstart/admin.py
./tutorial/quickstart/apps.py
./tutorial/quickstart/migrations
./tutorial/quickstart/migrations/__init__.py
./tutorial/quickstart/models.py
./tutorial/quickstart/tests.py
./tutorial/quickstart/views.py
./tutorial/settings.py
./tutorial/urls.py
./tutorial/wsgi.py
$ ./manage.py migrate
Operations to perform:
Apply all migrations: admin, auth, contenttypes, sessions
Running migrations:
Applying contenttypes.0001_initial... OK
Applying auth.0001_initial... OK
Applying admin.0001_initial... OK
Applying admin.0002_logentry_remove_auto_add... OK
Applying admin.0003_logentry_add_action_flag_choices... OK
Applying contenttypes.0002_remove_content_type_name... OK
Applying auth.0002_alter_permission_name_max_length... OK
Applying auth.0003_alter_user_email_max_length... OK
Applying auth.0004_alter_user_username_opts... OK
Applying auth.0005_alter_user_last_login_null... OK
Applying auth.0006_require_contenttypes_0002... OK
Applying auth.0007_alter_validators_add_error_messages... OK
Applying auth.0008_alter_user_username_max_length... OK
Applying auth.0009_alter_user_last_name_max_length... OK
Applying auth.0010_alter_group_name_max_length... OK
Applying auth.0011_update_proxy_permissions... OK
Applying sessions.0001_initial... OK
$ ./manage.py createsuperuser --email admin@example.com --username admin
Password: ********
Password (again): ********
Superuser created successfully.

Serializers

Serializertutorial/quickstart/serializers.py)を定義。
SerializerはデータをPythonデータ型に変換し、JSONなどのコンテンツタイプにレンダリングする処理を担う。
既定のクラスを継承して実装する。ここでは主キーフィールドの変わりにurlフィールドを使用するHyperlinkedModelSerializerを使用している。

1
2
3
4
5
6
7
8
9
10
11
12
13
14
from django.contrib.auth.models import User, Group
from rest_framework import serializers


class UserSerializer(serializers.HyperlinkedModelSerializer):
class Meta:
model = User
fields = ['url', 'username', 'email', 'groups']


class GroupSerializer(serializers.HyperlinkedModelSerializer):
class Meta:
model = Group
fields = ['url', 'name']

Views

Viewtutorial/quickstart/views.py)を定義。
ViewSetsでモデルのCRUD操作を暗黙的に実装している。

1
2
3
4
5
6
7
8
9
10
11
12
13
14
15
16
17
18
19
from django.contrib.auth.models import User, Group
from rest_framework import viewsets
from tutorial.quickstart.serializers import UserSerializer, GroupSerializer


class UserViewSet(viewsets.ModelViewSet):
"""
API endpoint that allows users to be viewed or edited.
"""
queryset = User.objects.all().order_by('-date_joined')
serializer_class = UserSerializer


class GroupViewSet(viewsets.ModelViewSet):
"""
API endpoint that allows groups to be viewed or edited.
"""
queryset = Group.objects.all()
serializer_class = GroupSerializer

URLs

urltutorial/urls.py)を定義。

1
2
3
4
5
6
7
8
9
10
11
12
13
14
from django.urls import include, path
from rest_framework import routers
from tutorial.quickstart import views

router = routers.DefaultRouter()
router.register(r'users', views.UserViewSet)
router.register(r'groups', views.GroupViewSet)

# Wire up our API using automatic URL routing.
# Additionally, we include login URLs for the browsable API.
urlpatterns = [
path('', include(router.urls)),
path('api-auth/', include('rest_framework.urls', namespace='rest_framework'))
]

Pagination

settingstutorial/settings.py)をカスタマイズ。

  • SECRET_KEYを環境変数で定義する
  • INSTALL_APPSでrest_frameworkを追加する
  • Pagenation(次のページ)を有効化する
1
2
3
4
5
6
7
8
9
10
11
12
13
14
15
16
17
18
19
# SECURITY WARNING: keep the secret key used in production secret!
SECRET_KEY = os.environ['SECRET_KEY']

…略…

INSTALLED_APPS = [
'django.contrib.admin',
'django.contrib.auth',
'django.contrib.contenttypes',
'django.contrib.sessions',
'django.contrib.messages',
'django.contrib.staticfiles',
'rest_framework',
]

REST_FRAMEWORK = {
'DEFAULT_PAGINATION_CLASS': 'rest_framework.pagination.PageNumberPagination',
'PAGE_SIZE': 10
}

アクセス

Viewとしてusersgroupsが定義されている

1
2
3
4
5
$ curl -H 'Accept: application/json; indent=4' -u admin:adminadmin http://127.0.0.1:8000/
{
"users": "http://127.0.0.1:8000/users/",
"groups": "http://127.0.0.1:8000/groups/"
}

Django REST framework quickstart width=640

Paginationを設定したので、応答にnextpreviousが追加されている。アイテム数が少ないので、値はnull。

1
2
3
4
5
6
7
8
9
10
11
12
13
14
15
16
17
18
19
20
21
$ curl -H 'Accept: application/json; indent=4' -u admin:adminadmin http://127.0.0.1:8000/users/
{
"count": 1,
"next": null,
"previous": null,
"results": [
{
"url": "http://127.0.0.1:8000/users/1/",
"username": "admin",
"email": "admin@example.com",
"groups": []
}
]
}
$ curl -H 'Accept: application/json; indent=4' -u admin:adminadmin http://127.0.0.1:8000/groups/
{
"count": 0,
"next": null,
"previous": null,
"results": []
}

Django REST framework quickstart width=640

Django REST framework quickstart width=640

コメント・シェア

DjangoのSECRET_KEYをGitの管理対象外にする

 
カテゴリー Python   タグ

DjangoのSECRET_KEY

A secret key for a particular Django installation. This is used to provide cryptographic signing, and should be set to a unique, unpredictable value.

django-admin startproject automatically adds a randomly-generated SECRET_KEY to each new project.

SECRET_KEYは暗号署名のために一意で予測不能な値にする必要がある。
django-admin startprojectで自動的にsetting.pySECRET_KEYにランダムな値が追加される。

The secret key is used for:

  • All sessions if you are using any other session backend than django.contrib.sessions.backends.cache, or are using the default get_session_auth_hash().
  • All messages if you are using CookieStorage or FallbackStorage.
  • All PasswordResetView tokens.
  • Any usage of cryptographic signing, unless a different key is provided.

If you rotate your secret key, all of the above will be invalidated. Secret keys are not used for passwords of users and key rotation will not affect them.

  • Sessions
    • django.contrib.sessions.backends.cache以外のセッションバックエンドを使用する場合
    • get_session_auth_hash()を使用する場合
  • messages
    • CookieStorageかFallbackStorageを使用する場合
  • PasswordResetView Tokens
  • Cryptographic signing
    • 異なる鍵が提供されない場合

setting.pyからSECRET_KEYの値を外だしする

GitリポジトリにSECRET_KEYをPushしないように、setting.pyに埋め込まれたSECRET_KEYを環境変数にして管理する。

1
2
# SECURITY WARNING: keep the secret key used in production secret!
SECRET_KEY = os.environ['SECRET_KEY']

.envファイルで環境変数を管理している場合は以下のように設定。

1
SECRET_KEY=e=+g9j8XXXXXXXXXXXXXXXXXXXXXXXXXXXXXXXXX@k8wj0&

コメント・シェア

Django REST framework

 
カテゴリー Python   タグ

django REST framework

  • The Web browsable API is a huge usability win for your developers.
  • Authentication policies including packages for OAuth1a and OAuth2.
  • Serialization that supports both ORM and non-ORM data sources.
  • Customizable all the way down - just use regular function-based views if you don’t need the more powerful features.
  • Extensive documentation, and great community support.
  • Used and trusted by internationally recognised companies including Mozilla, Red Hat, Heroku, and Eventbrite.
  • Webブラウジング可能なAPIによるユーザビリティ
  • OAuth1aとOuth2のための認証ポリシーを含む
  • ORMとnon-ORMの各データソースのシリアライズをサポート
  • 端から端までカスタマイズ可能
  • 広範囲のドキュメントとコミュニティサポート
  • さまざまな国際的企業で利用されている

Django REST framework width=640

BLACK LIVES MATTERやってる(2020/6/18)

Requirements

REST framework requires the following:

Python (3.5, 3.6, 3.7, 3.8)
Django (1.11, 2.0, 2.1, 2.2, 3.0)
We highly recommend and only officially support the latest patch release of each Python and Django series.

The following packages are optional:

coreapi (1.32.0+) - Schema generation support.
Markdown (3.0.0+) - Markdown support for the browsable API.
Pygments (2.4.0+) - Add syntax highlighting to Markdown processing.
django-filter (1.0.1+) - Filtering support.
django-guardian (1.1.1+) - Object level permissions support.

これを元にrequirement.txtを作成。

1
djangorestframework

Django REST frameworkのインストール

1
2
3
4
5
6
7
8
9
10
11
12
13
14
15
$ pip install -r requirements.txt
Collecting djangorestframework
Downloading djangorestframework-3.11.0-py3-none-any.whl (911 kB)
|████████████████████████████████| 911 kB 3.2 MB/s
Collecting django>=1.11
Downloading Django-3.0.7-py3-none-any.whl (7.5 MB)
|████████████████████████████████| 7.5 MB 10.5 MB/s
Collecting sqlparse>=0.2.2
Downloading sqlparse-0.3.1-py2.py3-none-any.whl (40 kB)
|████████████████████████████████| 40 kB 7.7 MB/s
Collecting asgiref~=3.2
Downloading asgiref-3.2.9-py3-none-any.whl (19 kB)
Requirement already satisfied: pytz in /usr/local/lib/python3.8/site-packages (from django>=1.11->djangorestframework->-r requirements.txt (line 1)) (2019.3)
Installing collected packages: sqlparse, asgiref, django, djangorestframework
Successfully installed asgiref-3.2.9 django-3.0.7 djangorestframework-3.11.0 sqlparse-0.3.1

Exampleで基本的な動作を見る

プロジェクト作成

  1. django-adminコマンドでexampleプロジェクトを作成
  2. manage.py migrateを実行
  3. manage.py createsuperuserでrootアカウント作成
1
2
3
4
5
6
7
8
9
10
11
12
13
14
15
16
17
18
19
20
21
22
23
24
25
26
27
28
29
30
31
32
33
34
35
36
37
38
39
40
41
42
43
$ django-admin startproject example .
$ tree .
.
├── README.md
├── docker-compose.yml
├── example
│ ├── __init__.py
│ ├── asgi.py
│ ├── settings.py
│ ├── urls.py
│ └── wsgi.py
├── manage.py
└── requirements.txt

1 directory, 9 files

$ ./manage.py migrate
Operations to perform:
Apply all migrations: admin, auth, contenttypes, sessions
Running migrations:
Applying contenttypes.0001_initial... OK
Applying auth.0001_initial... OK
Applying admin.0001_initial... OK
Applying admin.0002_logentry_remove_auto_add... OK
Applying admin.0003_logentry_add_action_flag_choices... OK
Applying contenttypes.0002_remove_content_type_name... OK
Applying auth.0002_alter_permission_name_max_length... OK
Applying auth.0003_alter_user_email_max_length... OK
Applying auth.0004_alter_user_username_opts... OK
Applying auth.0005_alter_user_last_login_null... OK
Applying auth.0006_require_contenttypes_0002... OK
Applying auth.0007_alter_validators_add_error_messages... OK
Applying auth.0008_alter_user_username_max_length... OK
Applying auth.0009_alter_user_last_name_max_length... OK
Applying auth.0010_alter_group_name_max_length... OK
Applying auth.0011_update_proxy_permissions... OK
Applying sessions.0001_initial... OK
$ ./manage.py createsuperuser
Username (leave blank to use 'root'):
Email address:
Password: ********
Password (again): ********
Superuser created successfully.

settings.pyのカスタマイズ

INSTALLED_APPSrest_frameworkを追加し、REST_FRAMEWORKで基本設定を行う。

1
2
3
4
5
6
7
8
9
10
11
12
13
14
15
16
17
INSTALLED_APPS = [
'django.contrib.admin',
'django.contrib.auth',
'django.contrib.contenttypes',
'django.contrib.sessions',
'django.contrib.messages',
'django.contrib.staticfiles',
'rest_framework',
]

REST_FRAMEWORK = {
# Use Django's standard `django.contrib.auth` permissions,
# or allow read-only access for unauthenticated users.
'DEFAULT_PERMISSION_CLASSES': [
'rest_framework.permissions.DjangoModelPermissionsOrAnonReadOnly'
]
}

url.pyのカスタマイズ

Example用のAPIをカスタマイズ。

1
2
3
4
5
6
7
8
9
10
11
12
13
14
15
16
17
18
19
20
21
22
23
24
25
26
27
28
from django.urls import path, include
from django.contrib.auth.models import User
from rest_framework import serializers, viewsets, routers

# Serializers define the API representation.
class UserSerializer(serializers.HyperlinkedModelSerializer):
class Meta:
model = User
fields = ['url', 'username', 'email', 'is_staff']


# ViewSets define the view behavior.
class UserViewSet(viewsets.ModelViewSet):
queryset = User.objects.all()
serializer_class = UserSerializer


# Routers provide a way of automatically determining the URL conf.
router = routers.DefaultRouter()
router.register(r'users', UserViewSet)


# Wire up our API using automatic URL routing.
# Additionally, we include login URLs for the browsable API.
urlpatterns = [
path('', include(router.urls)),
path('api-auth/', include('rest_framework.urls', namespace='rest_framework'))
]

APIのテスト

1
2
3
4
5
6
7
8
9
10
11
$ ./manage.py runserver
Watching for file changes with StatReloader
Performing system checks...

System check identified no issues (0 silenced).
June 17, 2020 - 15:50:19
Django version 3.0.7, using settings 'example.settings'
Starting development server at http://127.0.0.1:8000/
Quit the server with CONTROL-C.
[17/Jun/2020 15:50:42] "GET / HTTP/1.1" 200 47
[17/Jun/2020 15:50:49] "GET /users/ HTTP/1.1" 200 138

作成済のrootアカウントを閲覧できるか確認する。

1
2
3
4
5
6
7
8
9
10
11
12
13
$ curl -H 'Accept: application/json; indent=4' -u root:rootroot http://127.0.0.1:8000/
{
"users": "http://127.0.0.1:8000/users/"
}
$ curl -H 'Accept: application/json; indent=4' -u root:rootroot http://127.0.0.1:8000/users/
[
{
"url": "http://127.0.0.1:8000/users/1/",
"username": "root",
"email": "",
"is_staff": true
}
]

ユーザを追加する。

1
2
3
4
5
6
7
8
9
10
11
12
13
14
15
16
17
18
19
20
21
22
$ curl -X POST -d username=new -d email=new@example.com -d is_staff=false -H 'Accept: application/json; indent=4' -u root:rootroot http://127.0.0.1:8000/users/
{
"url": "http://127.0.0.1:8000/users/2/",
"username": "new",
"email": "new@example.com",
"is_staff": false
}
$ curl -H 'Accept: application/json; indent=4' -u root:rootroot http://127.0.0.1:8000/users/
[
{
"url": "http://127.0.0.1:8000/users/1/",
"username": "root",
"email": "",
"is_staff": true
},
{
"url": "http://127.0.0.1:8000/users/2/",
"username": "new",
"email": "new@example.com",
"is_staff": false
}
]

runserverは127.0.0.1で待ち受けるので、コンテナ外からアクセスできるように0.0.0.0で待ち受ける。

1
2
3
4
5
6
7
8
9
10
11
12
13
14
15
16
17
18
19
20
21
22
23
24
25
26
27
28
29
30
31
32
33
34
35
36
$ ./manage.py runserver 0.0.0.0:8000
Watching for file changes with StatReloader
Performing system checks...

System check identified no issues (0 silenced).
June 17, 2020 - 16:12:22
Django version 3.0.7, using settings 'example.settings'
Starting development server at http://0.0.0.0:8000/
Quit the server with CONTROL-C.
[17/Jun/2020 16:12:38] "GET / HTTP/1.1" 200 5322
[17/Jun/2020 16:12:38] "GET /static/rest_framework/css/bootstrap-tweaks.css HTTP/1.1" 200 3385
[17/Jun/2020 16:12:38] "GET /static/rest_framework/js/csrf.js HTTP/1.1" 200 1719
[17/Jun/2020 16:12:38] "GET /static/rest_framework/css/prettify.css HTTP/1.1" 200 817
[17/Jun/2020 16:12:38] "GET /static/rest_framework/js/prettify-min.js HTTP/1.1" 200 13632
[17/Jun/2020 16:12:38] "GET /static/rest_framework/css/bootstrap.min.css HTTP/1.1" 200 121457
[17/Jun/2020 16:12:38] "GET /static/rest_framework/css/default.css HTTP/1.1" 200 1131
[17/Jun/2020 16:12:38] "GET /static/rest_framework/js/bootstrap.min.js HTTP/1.1" 200 39680
[17/Jun/2020 16:12:38] "GET /static/rest_framework/js/ajax-form.js HTTP/1.1" 200 3597
[17/Jun/2020 16:12:38] "GET /static/rest_framework/js/default.js HTTP/1.1" 200 1268
[17/Jun/2020 16:12:38] "GET /static/rest_framework/js/jquery-3.4.1.min.js HTTP/1.1" 200 88145
[17/Jun/2020 16:12:39] "GET / HTTP/1.1" 200 5322
[17/Jun/2020 16:12:39] "GET /static/rest_framework/img/grid.png HTTP/1.1" 200 1458
Not Found: /favicon.ico
[17/Jun/2020 16:12:39] "GET /favicon.ico HTTP/1.1" 404 3137
[17/Jun/2020 16:13:02] "GET /users/ HTTP/1.1" 200 5886
[17/Jun/2020 16:13:03] "GET /static/rest_framework/css/bootstrap-tweaks.css HTTP/1.1" 304 0
[17/Jun/2020 16:13:03] "GET /static/rest_framework/css/default.css HTTP/1.1" 304 0
[17/Jun/2020 16:13:03] "GET /static/rest_framework/css/bootstrap.min.css HTTP/1.1" 304 0
[17/Jun/2020 16:13:03] "GET /static/rest_framework/css/prettify.css HTTP/1.1" 304 0
[17/Jun/2020 16:13:03] "GET /static/rest_framework/js/jquery-3.4.1.min.js HTTP/1.1" 304 0
[17/Jun/2020 16:13:03] "GET /static/rest_framework/js/csrf.js HTTP/1.1" 304 0
[17/Jun/2020 16:13:03] "GET /static/rest_framework/js/ajax-form.js HTTP/1.1" 304 0
[17/Jun/2020 16:13:03] "GET /static/rest_framework/js/default.js HTTP/1.1" 304 0
[17/Jun/2020 16:13:03] "GET /static/rest_framework/js/prettify-min.js HTTP/1.1" 304 0
[17/Jun/2020 16:13:03] "GET /static/rest_framework/js/bootstrap.min.js HTTP/1.1" 304 0
[17/Jun/2020 16:13:03] "GET /static/rest_framework/img/grid.png HTTP/1.1" 304 0

Django REST framework example width=640

Django REST framework example width=640

管理画面

from django.contrib import adminでインポートし、urlpatternsにpath('admin/', admin.site.urls),を追加する。

1
2
3
4
5
6
7
8
9
10
11
12
13
14
15
16
17
18
19
20
from django.contrib import admin
#from django.urls import path

#urlpatterns = [
# path('admin/', admin.site.urls),
#]

from django.urls import path, include
from django.contrib.auth.models import User
from rest_framework import serializers, viewsets, routers

…中略…

# Wire up our API using automatic URL routing.
# Additionally, we include login URLs for the browsable API.
urlpatterns = [
path('admin/', admin.site.urls),
path('', include(router.urls)),
path('api-auth/', include('rest_framework.urls', namespace='rest_framework'))
]

http://localhost:8000/admin/から管理機能にアクセスできる。

Django REST framework example width=640

Django REST framework example width=640

コメント・シェア

Sleepが安定しない…勝手に復帰してしまう

 
カテゴリー Windows   タグ

スリープが安定しない

PCをスリープさせて眠ろうとしたら……起動
再度スリープさせても……起動

解除しているデバイスは何か

管理者モードでコマンドプロンプトを起動して、powercfg -lastwakeで確認することができる。

1
2
3
4
5
6
7
8
9
10
11
12
13
14
15
C:\Windows\system32>powercfg -lastwake
スリープ状態の解除履歴カウント - 1
スリープ状態の解除履歴 [0]
スリープ状態の解除元カウント - 1
スリープ状態の解除元 [0]
種類: デバイス
インスタンス パス: USB\VID_XXXX&PID_XXXX\7&XXXXXXXXXXXXXXX
フレンドリ名:
説明: USB Composite Device
製造元: (標準 USB ホスト コントローラー)

C:\Windows\system32>powercfg -devicequery wake_armed
HID 準拠マウス
HID キーボード デバイス
HID キーボード デバイス (001)

イベントビューアーで確認する

Windowsログ -> システムでソースがPower-Troubleshooterのものを確認。

1
2
3
4
5
6
システムは低電力状態から再開しました。

スリープ時間: ‎2020‎-‎06‎-‎16T16:27:38.675253100Z
スリープ解除時間: ‎2020‎-‎06‎-‎16T16:28:02.205399800Z

スリープ状態の解除元: デバイス -USB Composite Device
1
2
3
4
5
6
システムは低電力状態から再開しました。

スリープ時間: ‎2020‎-‎06‎-‎16T16:39:26.214154100Z
スリープ解除時間: ‎2020‎-‎06‎-‎16T16:39:57.242369700Z

スリープ状態の解除元: デバイス -USB Composite Device

マウスは操作していないがUSB Composite Deviceによって30秒ぐらいでスリープ解除されている。

正常にスリープして復帰した場合は以下の様にスリープ時間~解除時間までは長い。

1
2
3
4
5
6
システムは低電力状態から再開しました。

スリープ時間: ‎2020‎-‎06‎-‎16T16:41:13.952273900Z
スリープ解除時間: ‎2020‎-‎06‎-‎16T22:51:34.244904400Z

スリープ状態の解除元: デバイス -USB Composite Device

スリープを邪魔しているものは

そもそもうまくスリープ後にすぐに復帰してしまう状態なので、何かが邪魔をしてスリープしないわけではない。

1
2
3
4
5
6
7
8
9
10
11
12
13
14
15
16
17
18
19
C:\Windows\system32>powercfg -requests
DISPLAY:
なし。

SYSTEM:
なし。

AWAYMODE:
なし。

実行:
[SERVICE] \Device\HarddiskVolume3\Windows\System32\svchost.exe (UsoSvc)
Universal Orchestrator

PERFBOOST:
なし。

ACTIVELOCKSCREEN:
なし。

Universal OrchestratorでWindowsUpdateのためにスリープ解除する事例は多いが、今回は違う。

解決方法1: スリープ解除タイマーを無効化する

WindowsUpdateのためにスリープ解除する事例の対策でよくある、スリープ解除タイマーの無効化。
電源オプションの詳細設定でスリープ -> スリープ解除タイマーの許可 -> 設定: 無効にする。

Disable sleep awake width=480

なぜかこれで解消してしまった。

解決方法2: マウスのスリープ解除を無効化する

デバイスマネージャーでマウスとほかのポインティングデバイス -> HID準拠マウスのプロパティで設定する。
このデバイスで、コンピューターのスタンバイ状態を解除できるようにするのチェックを外す。

Disable sleep awake width=480

こちらが本命だったが、これを設定してもマウスを動かすとスリープ解除してしまう……

コメント・シェア

Atuh0で多要素認証(MFA)を使う

 
カテゴリー SaaS   タグ

Multi-factor Authentication

Multi-factor Authenticationを有効化(One-time Password)

Security -> Multi-factor Authenticationで有効化。

Auth0 MFA width=640

One-time PasswordはGoogle Authenticatorなどのアプリケーションを使用する。
多要素認証(MFA)はRuleを使用して適用する条件を設定できるが、ここではテストのために、Require Multi-factor AuthAlwaysにして常に使用するように設定する。

Auth0 MFA width=640

Continueをクリック。

Auth0 MFA width=640

多要素認証のテスト

QRコードが表示されるので、Google Authenticatorで読み込む。

Auth0 MFA width=640

リカバリーコードが表示されるので保存しておく。

Auth0 MFA width=640

多要素認証(MFA)の登録完了。

Auth0 MFA width=640

ログイン。

Auth0 MFA width=640

複数の要素を有効化する(One-time Password + Email)

もうひとつの要素としてEmailを有効化。Email is not available as an authentication factor when using the Classic Universal Login experienceという警告が表示されており、デフォルトのClassic Universla Loginでは利用できない。

Auth0 MFA width=640

Branding -> Universla LoginをClassicからNewに変更する。

Auth0 MFA width=640

ログイン画面が赤基調から青基調に変わっている。

Auth0 MFA width=640

GitHubアカウントでログイン。

Auth0 MFA width=640

One-time Passwordの登録が優先されている。

Auth0 MFA width=640

ログイン。

Auth0 MFA width=640

改めて再ログインを試みる。登録したOne-time Passwordの入力を促されるが、最下部のTry another methodを選択。

Auth0 MFA width=640

Emailを選択。

Auth0 MFA width=640

E-Mailアドレスにコードが送られ、コードの入力画面になる。

Auth0 MFA width=640

コメント・シェア

Atuh0でソーシャルログインする

 
カテゴリー SaaS   タグ

Social Connections

Auth0はさまざまなソーシャルログイン連携をSocial Connectionsとして提供している。
これを有効化するだけで、ソーシャルログイン機能を利用することができる。

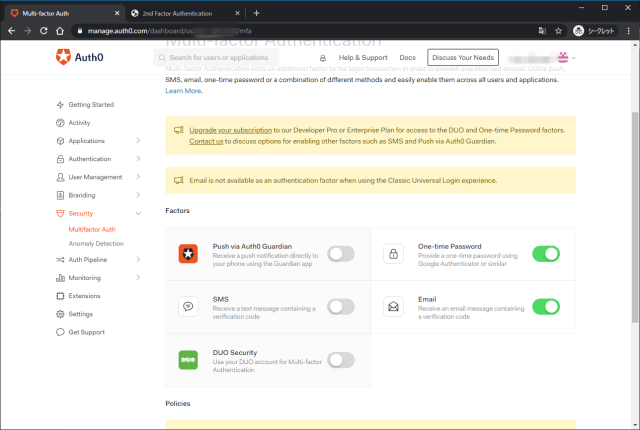
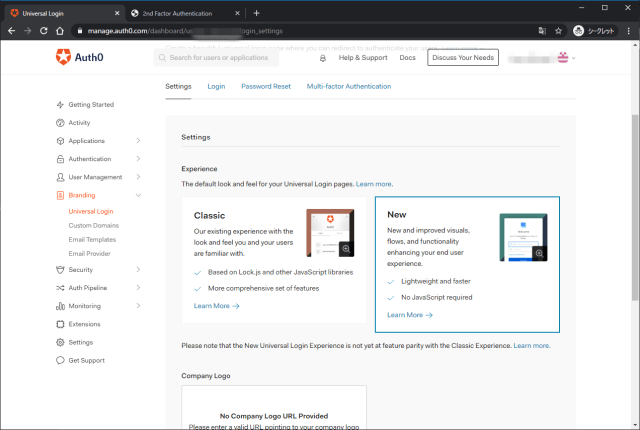
Social Connectionsの有効化

Authentication -> Socialから連携するサービスをONにする。デフォルトでGoogleが有効になっている。

Auth0 SocialConnections width=640

連携先としてGitHubを追加する。GitHubを選択すると、連携に関する設定が表示される。連携のためには各プロバイダー(Social Identity Providers)のクライアントID(Client ID)とシークレット(Client Secret)が必要だが、テストの場合指定しなくても使用することができる。

Auth0 SocialConnections width=640

Attributesとして取得する属性の値を選択する。

Auth0 SocialConnections width=640

ここではEmail Addressread userを選択した。

Auth0 SocialConnections width=640

Social Connectionsはアプリケーション毎に有効化するかどうかを選択できる。
デフォルトのDefault Appとチュートリアルで作成したtestappが表示されている。
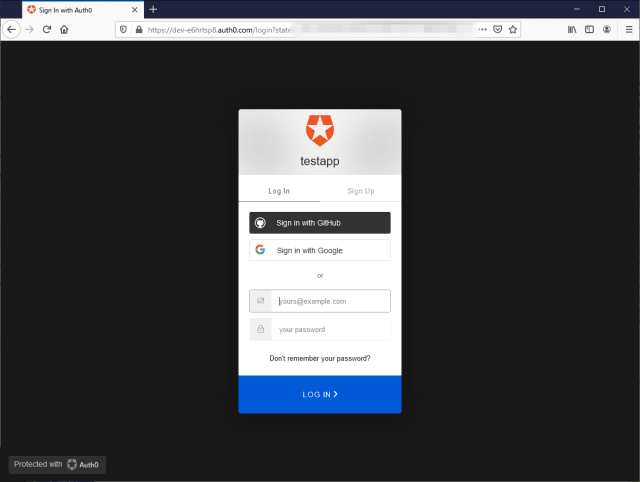
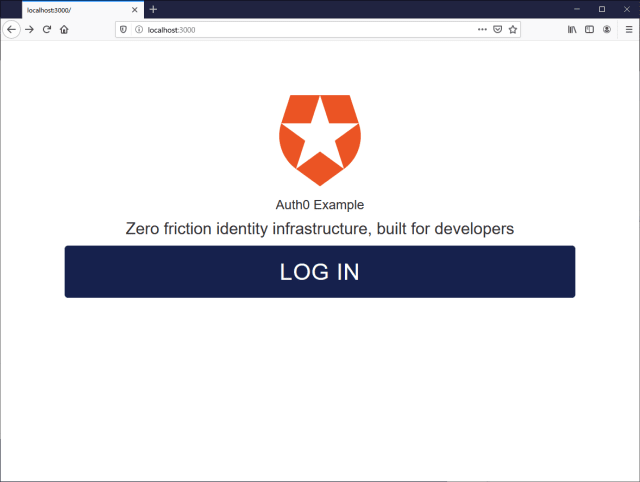
Auth0 SocialConnections width=640

ソーシャルログインのテスト1

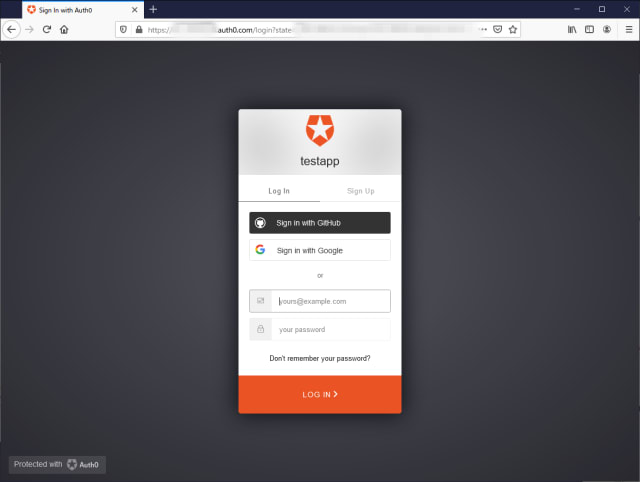
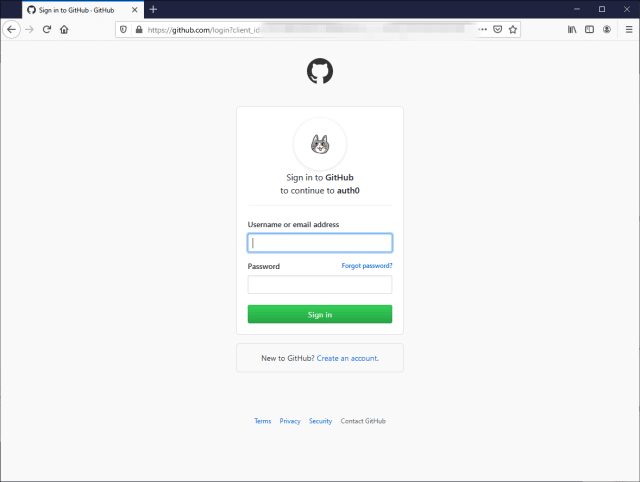
Default Appからログインする。画面にSign in with GitHubが現れている。

Auth0 SocialConnections width=640

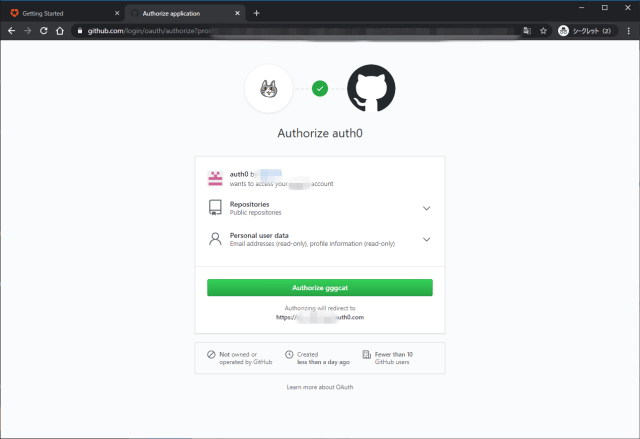
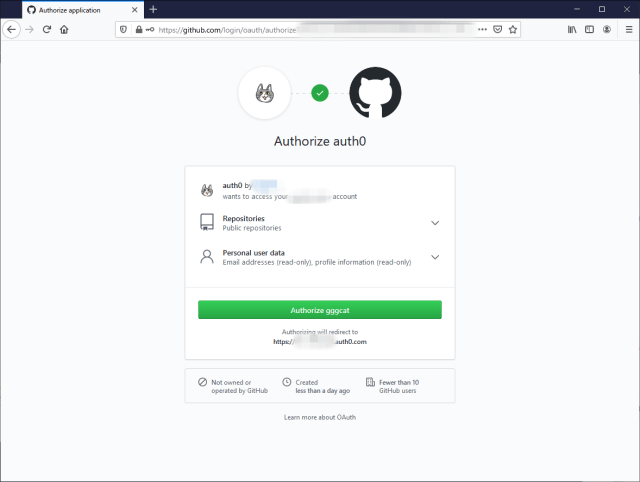
Auth0自身にGitHubアカウントでログインしているので、認証プロセスは省略され、Auth0に対する認可の確認画面が表示される。Email addresses (read-only)profile information (read-only)を許可するかどうかが問われる。

Auth0 SocialConnections width=640

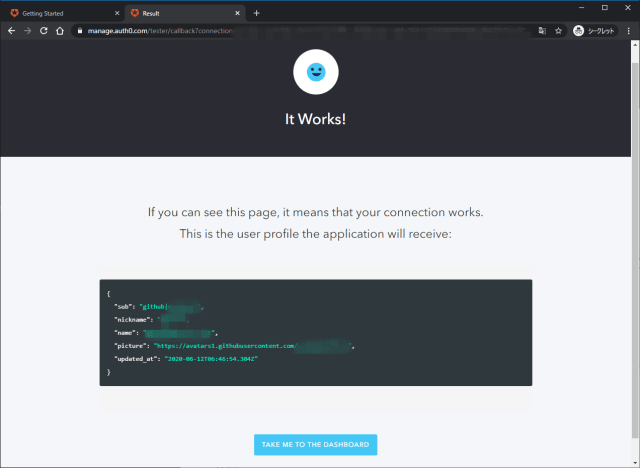
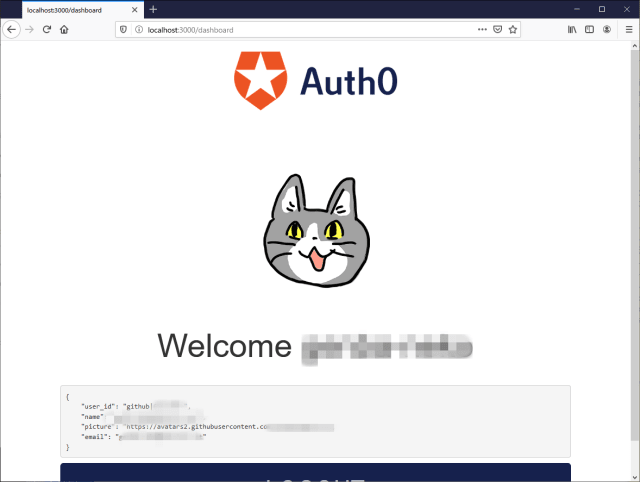
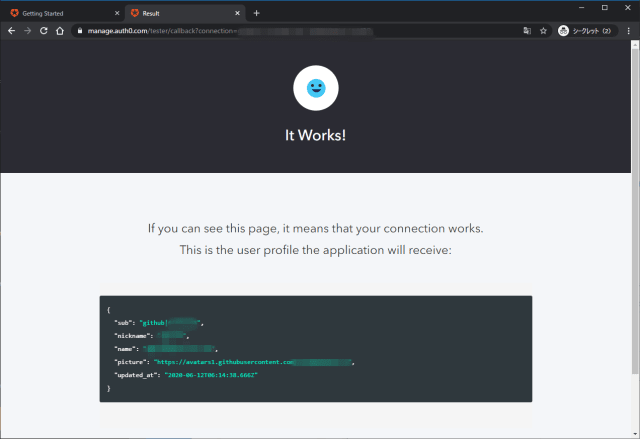
Authrorize auth0を選択するとログイン後のページが表示される。

Auth0 SocialConnections width=640

ソーシャルログインのテスト2

testappからログインする。

Auth0 SocialConnections width=640

同じGitHubユーザで一度ログインしているのでAuth0に対する認可画面はない。
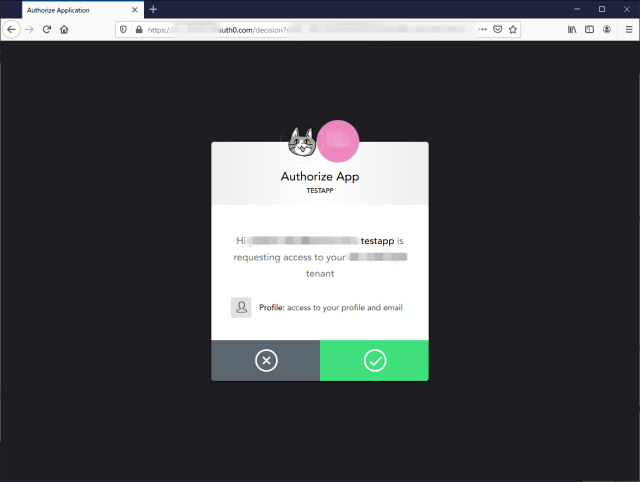
Auth0 SocialConnections width=640

アプリに対する認可の画面が表示される。

Auth0 SocialConnections width=640

認可するとログイン後のページが表示される。

Auth0 SocialConnections width=640

Client IDとClient Secretを取得する

ログインできることを確認できたので、GitHubのクライアントID(Client ID)とシークレット(Client Secret)を取得する。

Client IDとClient Secretの発行で必要になるドメイン名を確認する。Settings -> Custom Domainsで確認。

Auth0 SocialConnections width=640

GitHubのSettings -> Developer settingsOAuth AppsRegister a new application

Auth0 SocialConnections width=640

Auth0 SocialConnections width=640

指定の情報を入力してRegister applicationで、Client IDとClient Secretを発行。

  • Homepage URLhttps://YOUR_DOMAIN
  • Authorization callback URLhttps://YOUR_DOMAIN/login/callback

Auth0 SocialConnections width=640

登録されたOAuth appの画面からClient IDとClient Secretを取得することができる。この画面上でこの連携を経由して連携されたユーザの数が表示されている。このGitHubアカウント以外のGitHubアカウントも連携することができる。

Auth0 SocialConnections width=640

連携時の認可画面で表示するアイコンを設定することができる。

Auth0 SocialConnections width=640

Auth0 SocialConnections width=640

Auth0 SocialConnections width=640

Client IDとClient SecretをAuth0に登録する

Client IDとClient Secretを設定していない場合、!が表示されている。

Auth0 SocialConnections width=640

Client IDとClient Secretを設定し、追加でpublic_repoを連携する。

Auth0 SocialConnections width=640

!が表示されなくなる。

Auth0 SocialConnections width=640

ソーシャルログインのテスト3

Default Appから再度ログインする。一度ログイン済のため、ログイン画面は表示されず、先ほど追加したpublic_repoを含めた認可の画面が表示される。Auth0のアイコンはGitHubで設定したアイコンに変わっている。

Auth0 SocialConnections width=640

認可後は同じ。

Auth0 SocialConnections width=640

ソーシャルログインのテスト4

testappからログインする。

Auth0 SocialConnections width=640

こんどは新しいGitHubアカウントでログインする。

Auth0 SocialConnections width=640

設定したアイコンが表示されている。

Auth0 SocialConnections width=640

GitHubで認証すると、Auth0に対する認可画面が表示される。

Auth0 SocialConnections width=640

アプリに対する認可の画面が表示される。

Auth0 SocialConnections width=640

新しいアカウントでログインしたため2アカウントが表示されている。

Auth0 SocialConnections width=640

コメント・シェア


nullpo

めも


募集中


Japan